Crumbs, spilled drinks, mud, and sticky fingerprints can quickly turn the area around a child safety seat into one of the messiest parts of a vehicle. Cleaning it properly requires more care than ordinary upholstery work because convenience should never interfere with the correct installation or condition of the restraint.
Start With the Accessible Areas
Begin by removing loose trash and vacuuming around the edges of the seat. Use a narrow vacuum attachment to reach crumbs beside the seat base and along the seat cushions without disturbing belts or attachment points unnecessarily.
Routine car ownership guidance often emphasizes inspection alongside cleaning. That approach makes sense here because a cleanup session can reveal spills, damaged upholstery, or debris packed around lower anchor areas.
Work From Dry Debris to Spills
Vacuum first. Adding cleaner before removing crumbs can turn dry dirt into a sticky paste that becomes harder to extract.
For small spills on the vehicle upholstery, use a cleaner appropriate for the material and apply it to a cloth rather than flooding the seat beneath the child restraint.
Protect the Installation
If the child seat must remain installed, clean around it carefully rather than pulling or twisting it for access. Do not loosen straps, anchors, or seat-belt routing merely to reach a hidden crumb.
Families reviewing vehicle interior care topics may find plenty of cleaning suggestions, but the child restraint manufacturer’s instructions should take priority for anything involving the safety seat itself. Cleaning products acceptable for automotive upholstery aren’t automatically suitable for harnesses or restraint components.
| Mess | First Approach | Avoid |
|---|---|---|
| Dry crumbs | Vacuum carefully | Pushing debris deeper |
| Small drink spill | Blot promptly | Heavy soaking |
| Mud marks | Let loose dirt dry | Aggressive scrubbing |
| Sticky residue | Use suitable cleaner | Coating restraint parts |
Pay Attention Around Anchors and Buckles
Food particles can collect in narrow gaps around the vehicle seat. Remove visible debris gently, especially near lower anchors and seat-belt hardware.
Modern cabins may also have heated seats, occupancy sensors, or wiring below the cushion. Reading broader automotive wiring topics can help explain why pouring large amounts of liquid cleaner into seat seams is a poor cleaning strategy.
Work with controlled moisture. A slightly damp microfiber cloth often provides better control than spraying directly into gaps.
Handle Odors Without Masking Them
A sweet air freshener won’t fix milk, juice, or food trapped beneath a child seat. Odor usually means some residue remains.
Blot spills quickly and clean the affected vehicle upholstery according to its care requirements. Allow the area to dry fully before covering it with mats, protectors, or other accessories.
If the child restraint itself is dirty, consult its manual. Harness straps, padding, covers, and buckles can have specific cleaning restrictions.
Mistakes That Can Create New Problems
The biggest mistake is treating a child safety seat like ordinary upholstery. Strong chemicals, machine washing, soaking, or aggressive scrubbing may be prohibited for certain restraint components.
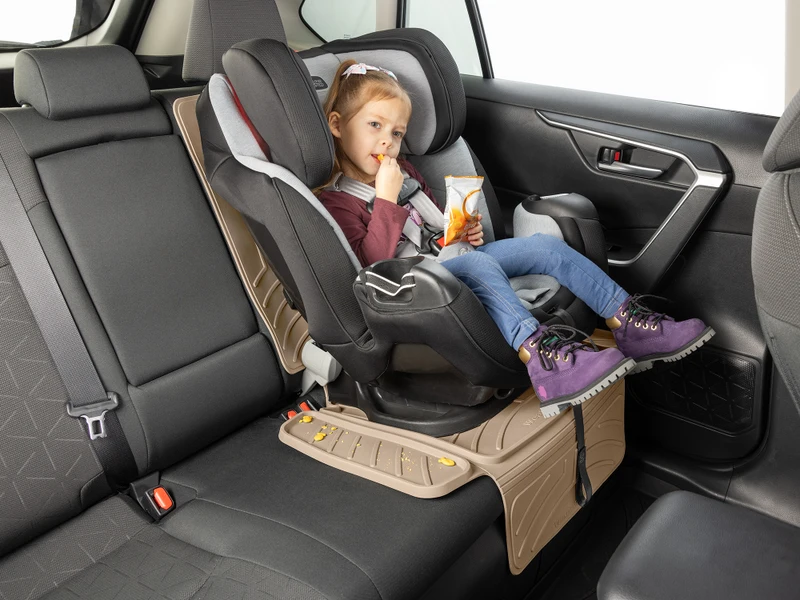
Another mistake is adding thick aftermarket protectors beneath the seat without checking whether the child seat manufacturer allows them. Cleaning should preserve a safe installation, not create a cleaner-looking setup that changes how the restraint sits.
Frequently Asked Questions
Can I vacuum around an installed child car seat?
Yes, accessible areas can usually be vacuumed carefully without disturbing the installation. Use a narrow attachment and avoid pulling on harnesses, seat belts, anchors, or adjustment components.
What should I use for spilled drinks under a child seat?
Blot the liquid first, then clean the vehicle upholstery with a product appropriate for that surface. Avoid saturating seams or allowing cleaner to soak into electrical components beneath the seat.
Should I remove the child seat for deep cleaning?
Removal can provide better access, but the seat must then be reinstalled exactly according to its manufacturer’s instructions and applicable vehicle guidance. If you’re uncertain about installation, get qualified child-restraint assistance.
Keep Cleanliness Secondary to Correct Restraint Use
A clean back seat is worthwhile, but restraint safety comes first. Vacuum loose debris, control moisture, and follow the correct cleaning instructions for every material involved.
Whenever cleaning requires moving the child seat, reinstall it carefully rather than relying on memory. A few remaining crumbs are less important than maintaining the position and attachment method designed to protect the passenger.